Recently I’ve been doing some splitting and it was tiring to put all the sinks and sources manually, sometimes in hunders for a single split. So I started looking for ways to do it semi-automatically. At first, I wanted to do it via another TamperMonkey script, but I couldn’t make it work. So I’ve asked ChatGPT for solutions and it suggested using this neat little software called AutoHotkey. It allows assigning any combinations of key presses and mouse clicks to any other combinations.
Again, using ChatGPT and Grok I was able to generate this script:
#Requires AutoHotkey v2.0
SetTitleMatchMode '2'

isClicking := false

~Ctrl::
~Shift::
{
  SetTimer WatchKeys, 50
}

~Ctrl Up::
~Shift Up::
{
  if !GetKeyState("Ctrl", "P") && !GetKeyState("Shift", "P") {
    StopClicking()
  }
}

WatchKeys() {
  global isClicking
  if WinActive("neuroglancer") && GetKeyState("Ctrl", "P") && GetKeyState("Shift", "P") {
    if !isClicking {
      SetTimer DoClick, 200
      isClicking := true
    }
  } else {
    if isClicking {
      SetTimer DoClick, 0
      isClicking := false
    }
  }
}

StopClicking() {
  global isClicking
  SetTimer DoClick, 0
  SetTimer WatchKeys, 0
  isClicking := false
}

DoClick() {
  if !WinActive("neuroglancer") || !GetKeyState("Ctrl", "P") || !GetKeyState("Shift", "P") {
    StopClicking()
    return
  }
  SendEvent('{Ctrl down}')
  Click
  SendEvent('{Ctrl up}')
}
In theory it could work in the whole OS, because AHK isn’t limited to a browser, but we (me and the LLMs xD ) limited it to only windows/tabs, which titles are “neuroglancer” (case insensitive).
What it does
Whenever you press and hold both Ctrl and Shift it will automatically simulate a mouse click every 200ms until you release at least one of the keys. So, when you’re doing a split, instead of manually putting all the sources and sinks, you can just hold those two keys and move your mose along the segments.
How to use it
You have to download the software, start it, then create a New script. Give it any name you find useful then click Create. It will create a new empty text file (with .ahk extension) and open the folder with the script. You can then edit the file using any text editor (Notepad is good enough) and paste the text from above into it. Save changes and the script is ready. Whenever you want to use it, just double-click the script (the .ahk file) and it will be running. You should also see a green H icon on your taskbar. If you want to terminate the script, just right-click the icon and select Exit.
Using the AHK tool you can even compile the script to an .exe file. With that, you would be able to uninstall the tool, and just start the .exe file.
You can also make it auto-start with Windows by following any tutorials available on the Internet on how to add a program to the auto-start.
Ready to use version
If you don’t want to play with the AHK, here’s the script above compiled: Google Drive (there might be a warning about an executable file being a potential threat).
My use
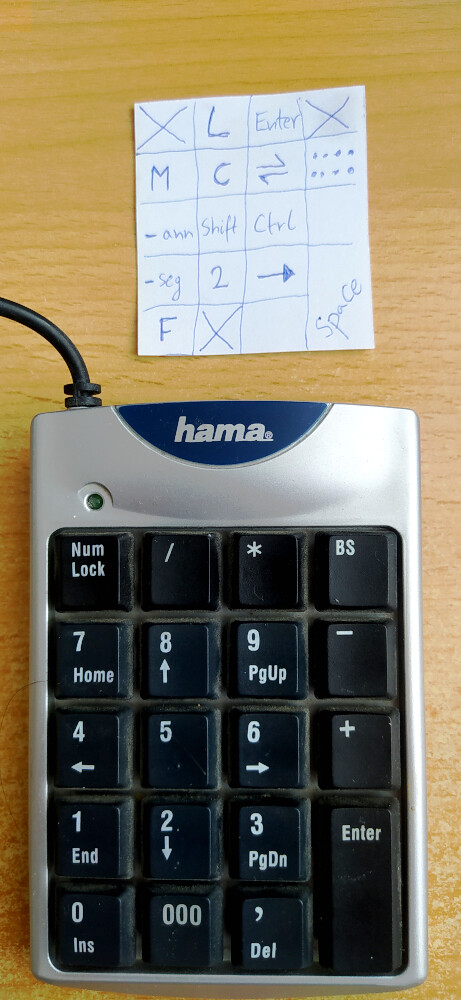
When I discovered the usefulness of this remapping, I’ve dug out my old numeric keyboard and remapped almost all the keys to have a sort of navigation panel for the whole Neuroglancer ![]() :
: